If you’ve ever been on a hike on a sunny day you may have noticed that the photos you take have high levels of contrast between the bright spots and shady spots. This can be hard to manage as an amateur photographer, but can be easily corrected using a technique called High Dynamic Range, or HDR photography. This technique manages to keep information from the bright and dark areas, by combining multiple exposures. The resulting images have stunning detail that would otherwise be lost. In this blog post, we will explain the elements of a camera, the importance of HDR photography, and some tips for taking your own HDR photos.
Photography Basics
Since its invention in the late 1830s, much has changed in the photography industry, from the cameras themselves to the way people take photos. One of the major changes has been the advent of digital photography as it does not require any additional work to develop the photos. Current smartphones are comparable to classic cameras and employ special techniques to ensure photos have more detail.
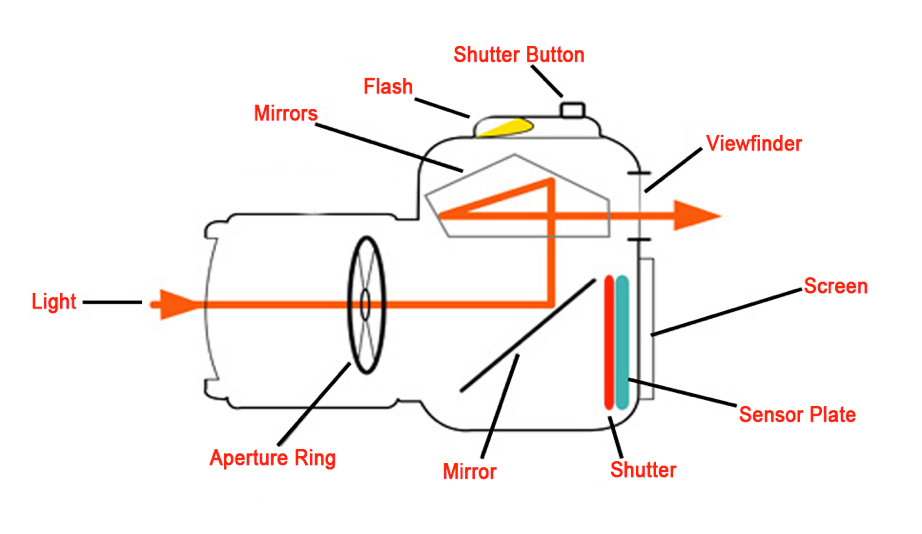
There are several elements of a camera that all work together to turn the light from an object into a photo. Below is a diagram of the inner working of a single reflex lens (SLR) camera. The orange ray indicates the path the light takes from the object to the viewfinder. Along this path, the light is first focused by a lens before passing through an adjustable aperture. The light is then reflected off the mirrors and into the viewfinder. With SLR cameras, the first mirror can be moved to allow light to enter the sensor plate. The sensor plate has a mechanical shutter that prevents light from being detected, and the amount of time the shutter is left open is called the exposure time.

A cross sectional diagram of a SLR camera. This setup can be used for both digital and film cameras. Courtesy of Digital Relativity.
Lenses
The first component of a camera that many people think of are the lenses that attach to the front. The type of lens a photographer chooses is determined by the subject matter. A standard objective lens most closely imitates the field of view and focal length of the human eye. This makes it a very common choice for starting photographers.
There exists a large variety of compound lens objectives designed to address various aspects of photography. For instance, there are lenses for very small subjects, macro lenses. These actually have long focal lengths but increase the magnification of the light. Since these lenses are used for small objects, they need to be able to handle non-parallel light rays. Telephoto lenses, on the other hand, are used for taking long distance images, such as for sports, concert, or astro-photography. These lenses are usually very large and have a very small field of view compared to the standard lens.
The focal length of each lens is listed in the lens specifications, when purchasing. A standard fixed lens has a focal length of 50 mm. This measures the distance from the lens plane to the focal plane, on the sensor. We must note however that objective lenses are more complicated than a single lens, containing multiple lenses of varying focal lengths and moving parts. Despite this, we can approximate the system as a single lens.
Aperture
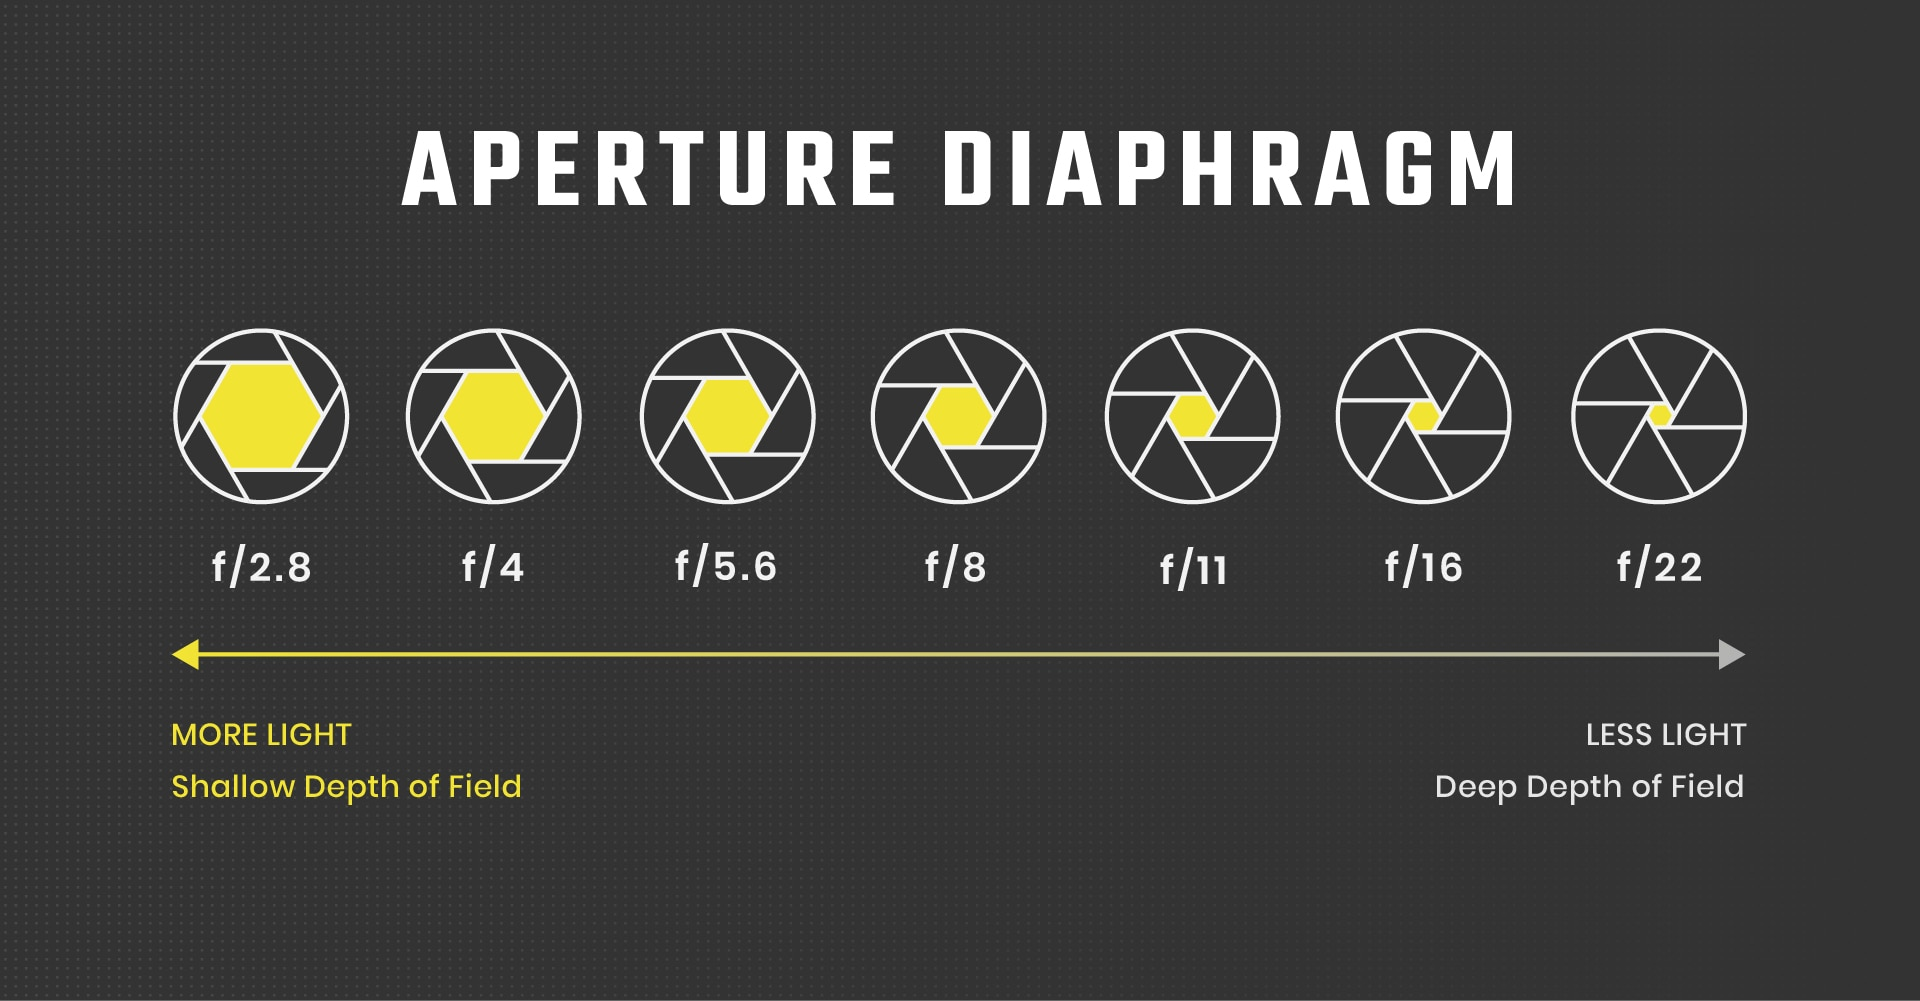
The amount of light that enters the camera is dictated by the size of the aperture, and is measured with respect to the focal length. As a result its is often called the f-number. When adjusting the aperture, it’s important to note that the depth of field is also being adjusted. This can be seen in the below image, and results from changing the angle of the light rays entering the camera. As the aperture decreases the angle is narrowed, leading to a deeper depth of field. This also means less light can enter the camera, and the exposure time must be increased to compensate.

A diagram of aperture sizes. Courtesy of Pavilion Dinfos Online Learning.
Shutter
The shutter sits directly in front of the sensor, and prevents light from entering the sensor. When the shutter release is pressed, the shutter opens and allows light pass through to the sensor. The amount of time that the shutter stays open is determined before taking the picture, and can be adjusted depending on the brightness of the subject. On a sunny day, shorter exposure times are required, as the subjects will be brightly illuminated. In contrast, night photography requires much longer exposure times, sometimes being measured in minutes. This becomes a challenge for photographers, as the camera must be held still when using longer exposure times or the image will come out blurry.
Sensors
The most important part of a digital camera is the sensor that captures the light. Unlike film cameras, digital cameras are restricted in resolution depending on the number and size of the pixels in the sensor. A full frame sensor is one that has the same dimensions as 35 mm film. However, cameras on smartphones and laptops have much smaller lenses and, thus, have much smaller sensors.
The type of sensor also plays an important role. Charged coupled device (CCD) and Complementary metal–oxide–semiconductor (CMOS) sensors are the most common. CCD sensors dominated the industry for a while, as they’ve been around longer and produced better quality images, but CMOS sensors are quickly taking over as the semiconductor industry continues to expand. Both CCD and CMOS sensors convert photons to electric charge and then read off the values of each pixel. The main difference between these is the way the camera’s computer reads the image off the sensor. A CCD uses much more energy to read the pixel values, and prevent distortion of the image. CMOS sensors, on the other hand, use very little energy but often have noisier images.
The Problem with Extreme Lighting
When the lighting is extreme enough, taking photographs with the right exposure becomes a tricky problem. For example, photos taken inside a building but near a window have highly varied light levels. Some areas of the subject may be in shadow while others are brightly illuminated. When a digital camera attempts to capture this type of image traditionally, the photographer must choose whether to use proper exposure for the shaded area or the brightly lit area. However, by employing HDR photography, the photographer can capture both areas of the image with proper exposure.

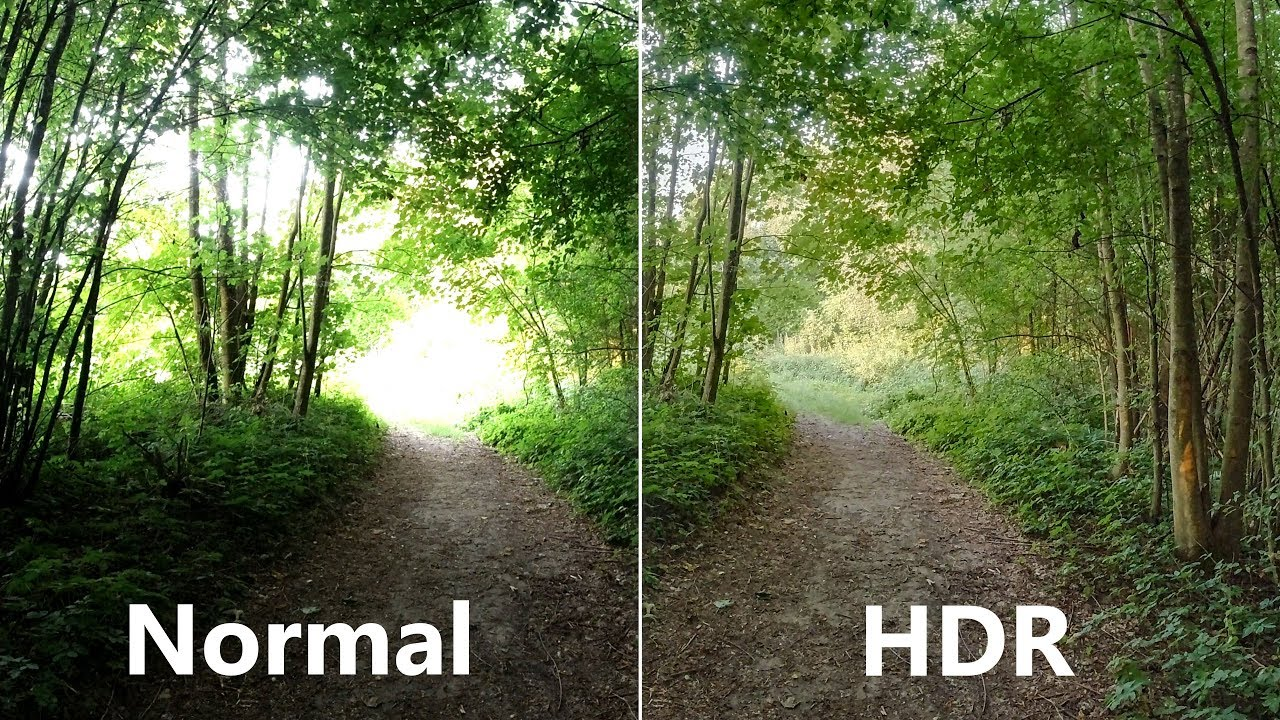
A comparison of a normal (left) and HDR (right) image. Courtesy of Lapse of the Shutter.
In the above images, there are some obvious differences. Within the normal image, the end of the path is over exposed, while the foliage is underexposed. In both cases important information is lost. However, the HDR image captures both areas with proper exposure. This allows us to see more detail in the forested area as well as the path.
How does HDR Photography work?
Many professional photo cameras today automatically incorporate HDR photography. Even some smartphones take HDR photos by taking multiple exposures and combining them before displaying. Some DSLR cameras also have this mechanic built in and don’t require post processing. However, many cameras do not have this feature, so here we will describe how to do it manually.
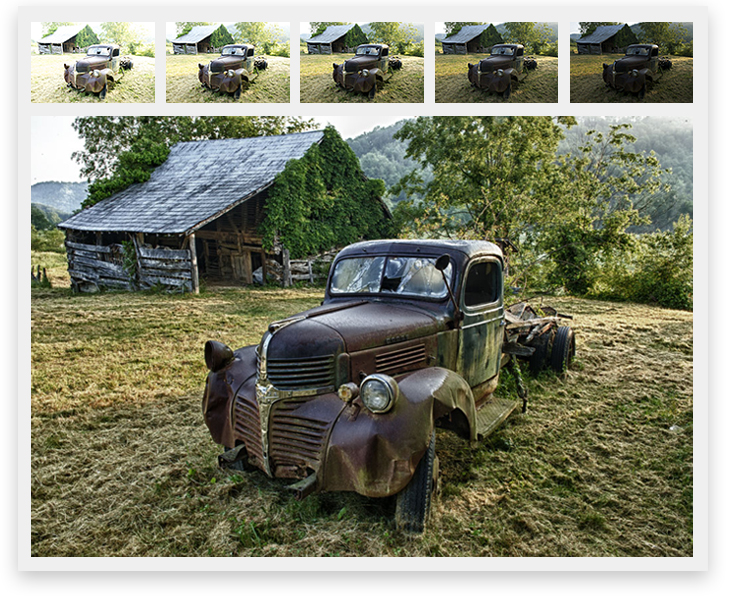
Taking an HDR photo requires taking several photos of the same image but with different exposure levels, which can be seen in the image below. This is best achieved by setting the camera up on a tripod to ensure that the camera is not moving between images. A shutter release button also helps to prevent the camera from shaking as you take the photo.

HDR photos require several images at different exposure levels. Courtesy of Nikon USA.
Once you’ve taken a couple images, a minimum of 3, they need to be processed in an image processing program. Many programs like Lightroom and Photoshop have automated processes to merge the set of photos into one HDR image.
It’s important to note that by creating an HDR image, you are increasing the dynamic range of the image. This means that an 8-bit picture will become a 16 or 32-bit picture. The bit size of a phot refers to the possible values a pixel can take. For an 8-bit photo, there are 2^8 possible values, or 256. For a color photo, each pixel has three values: red, green, and blue. Increasing the range to 32-bits means there are many more values each pixel can take, allowing for much more information to be retained in the image.
Summary
This blog post only covers the basic ideas of HDR photography, to increase the detail and information contained in a photo. In many cases, this technique is used for purely artistic purposes, as HDR photos more closely resemble how our eyes capture light. However, this is a very easy process that is often incorporated directly in the camera. Interested readers might want to explore this technique further reading even more in-depth articles on the topic.
By the way, do you know any tips and tricks to increase the quality of your photos? Please comment below. If you liked this post, please share and subscribe.
This blog post was sponsored by art photonics GmbH– a leader in the development and production of specialty fiber optic products for a wide range of applications.
