Introduction to laser powder bed fusion
In this article, we discuss a novel work introduced by the researchers at the Lawrence Livermore National Laboratory and University of Nebraska-Lincoln in the USA. The aim of this work is to exploit physical insights from the process to detect fault creation in a particular type of additive manufacturing process termed laser powder bed fusion (LPBF) using data gathered from heterogeneous in-process sensors.
It is imperative to continuously monitor the process using the machine’s built-in sensors in order to ensure the functional integrity of the parts being produced using additive manufacturing. Once this is done, flaws can then be found through real-time analysis of the streaming in-process sensor signatures before they are covered up by subsequent layers.
To establish a smart additive manufacturing paradigm for the quality assurance of additively manufactured parts, it is essential to develop a reliable method for sensor-based in-situ flaw detection. This paradigm should evaluate the functional properties of the part during the process rather than paying for expensive offline characterization of the part using X-ray computed tomography and post-process materials characterization.

Figure 1: Optical microscopy images of single tracks deposited at different laser power and laser velocity. Image courtesy of Elsevier
In LPBF, a bed of metal is covered with powder, which is then selectively fused layer by layer using energy from a laser. Through the fast movement of two galvanometric mirrors, a laser scans a rectilinear path, and the interaction between the laser and the powder material that results in the melt pool.

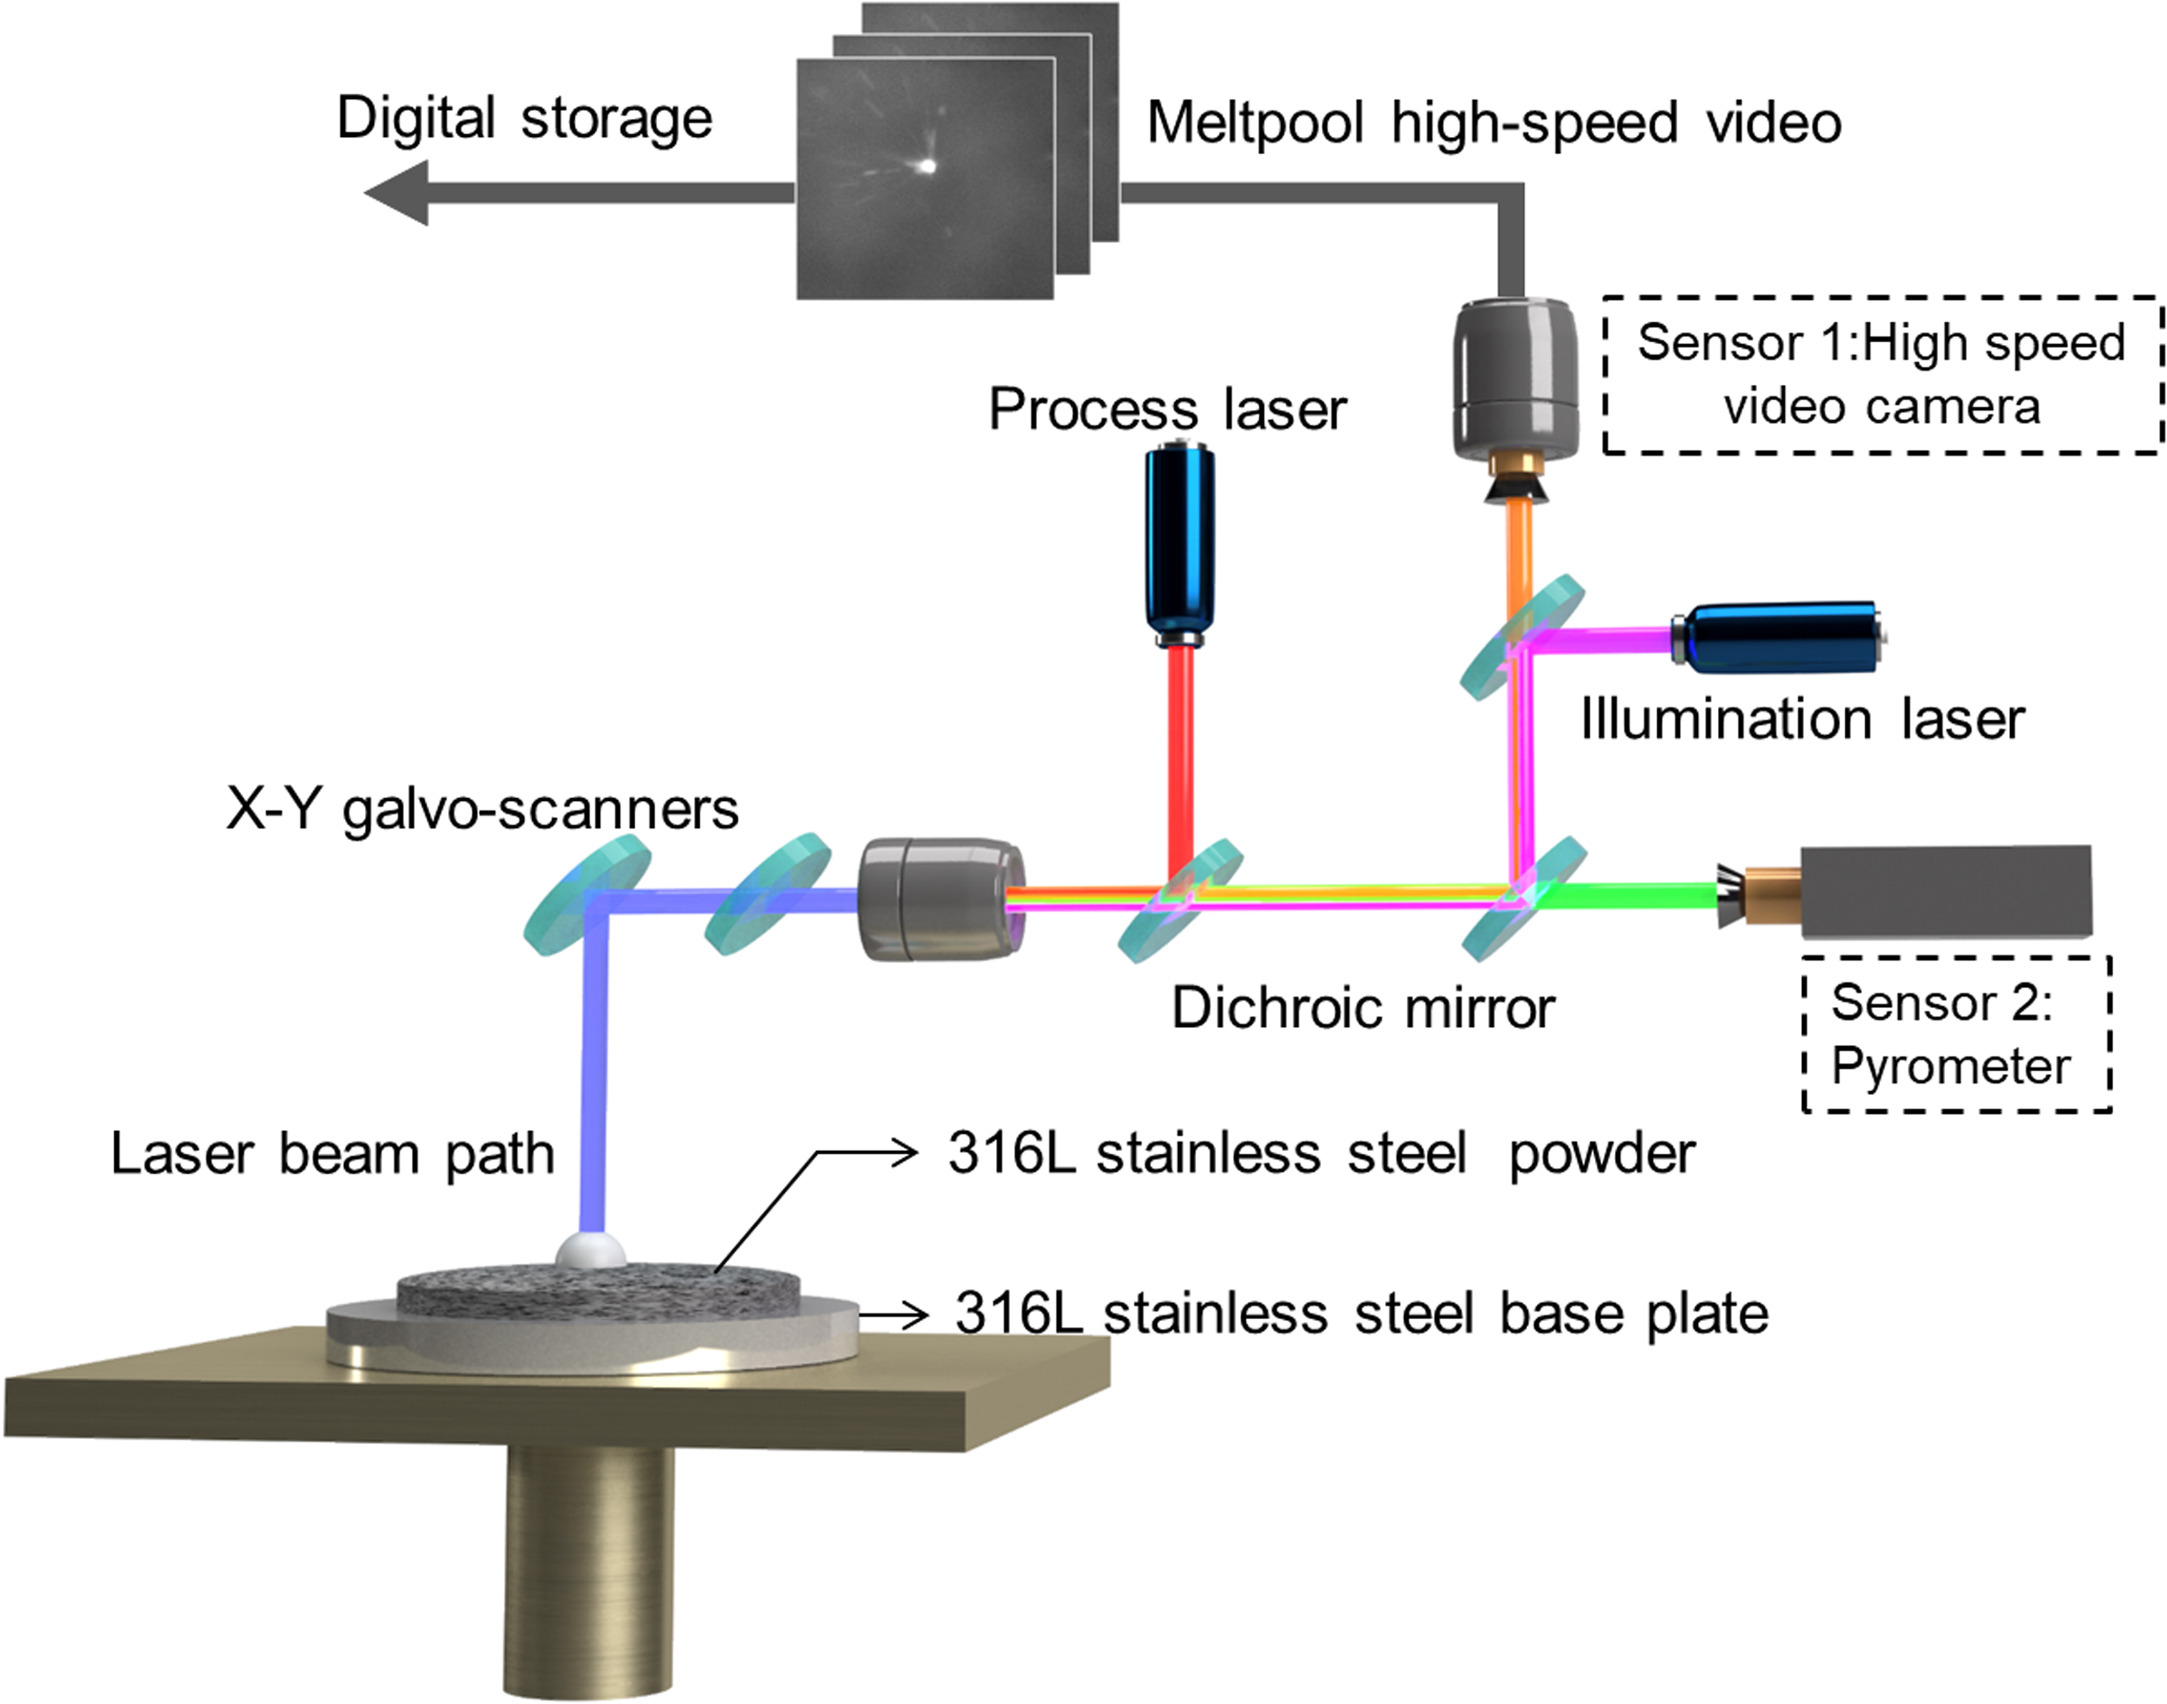
Figure 2: Schematic of the experimental setup. Image courtesy of Elsevier
Along the laser-scanned path, the material solidifies after the melt pool. Single-track or hatch refers to this area of hardened material along the laser beam path. The part’s layers are made up of multiple overlapping single tracks. After each layer is fused, a fresh layer of powder is raked on top, and so on until the part is entirely constructed.
Heterogeneous sensing of laser powder bed fusion
Figure 1 illustrates quality disparities. A single track with uniform margins, no discontinuities, and no satellite artifacts is depicted in Figure 1. It is advantageous to have these single-track properties while creating laser powder bed fusion additively produced parts. Figure 1 depicts also a single-track with inconsistent consolidation.
We observe that the laser powder bed fusion process belongs to the broad category of additive manufacturing techniques known as powder bed fusion (PBF). The powder material in PBF can be fused using a variety of energy sources. In addition to using a laser, other energy sources include infrared heating and an electron beam. Manufacturers have recently released LPBF systems with numerous lasers to boost processing rates. Rapid whole-layer scans are made possible by using a photomask-like array of optically programmable light valves to shape an infrared beam.
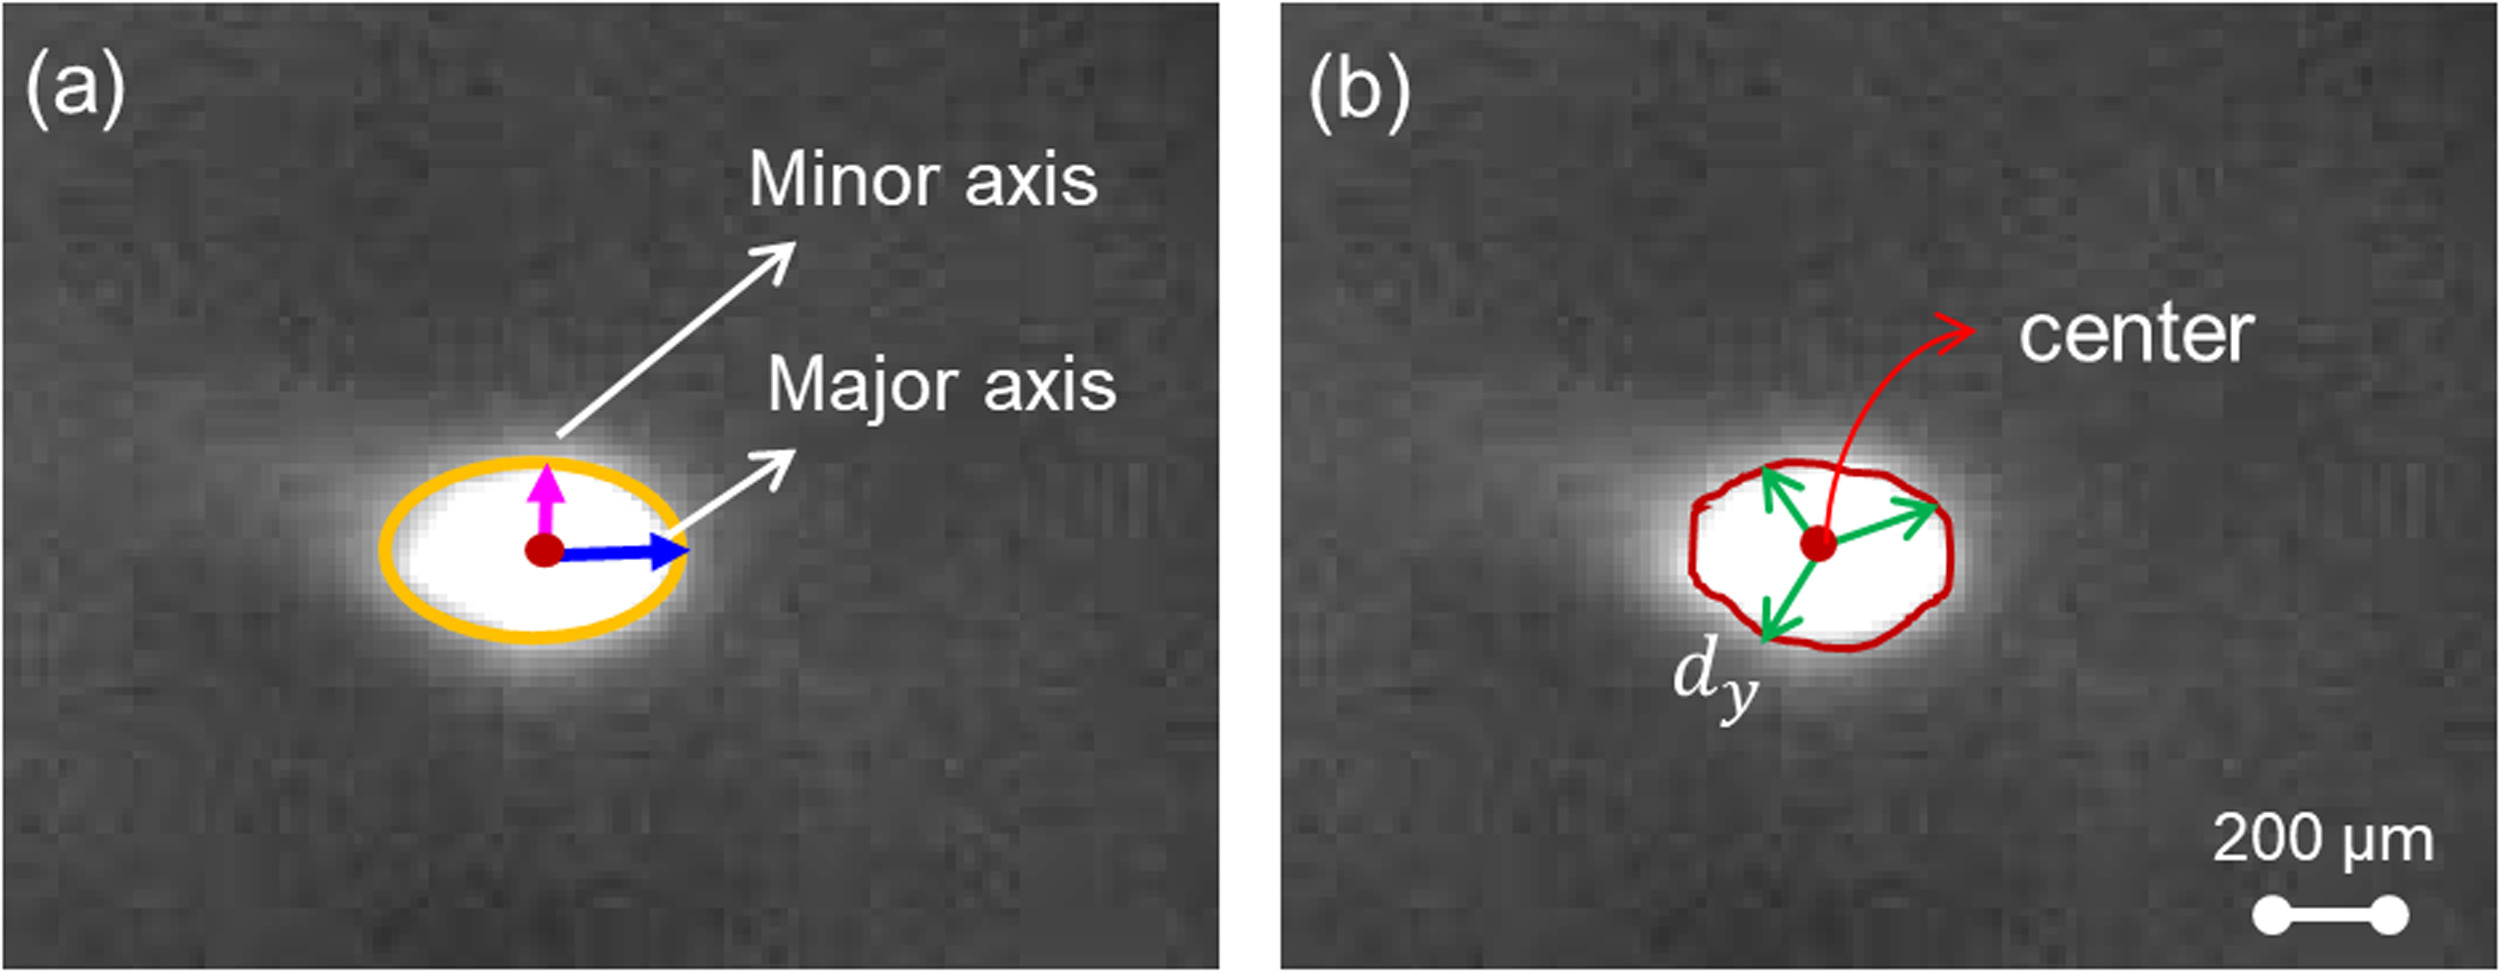
The fusion of heterogeneous sensor data is essential for the quick and precise in-situ identification of laser powder bed fusion faults, such as those highlighted in Figure 1, from in-process sensor data. Here, a pyrometer and a high-speed optical video camera positioned coaxially to the laser path to record melt pool-level phenomena are used to estimate the integrity and construction quality of a single-track. You might see Figure 3 and Figure 4 for a visual explanation.
Since single tracks serve as the fundamental unit of construction for LPBF parts, it is important to detect and fix faults at the single-track level in order to prevent anomalies from being sealed in by later layers and cascading to the level of bigger parts.
Machine learning for quality assurance in laser bed fusion
At the moment, machine learning-based analysis of in-process sensor data is the main method used for process monitoring in additive manufacturing to identify specific fault kinds. For instance, machine learning is used to identify patterns from in-situ sensors, such as melt pool shape and size, in unsupervised, semi-supervised, and supervised modes.
These patterns are then linked to a flaw, such as porosity. Through offline evaluation of the part quality, often using X-ray computed tomography, the prediction of the model is validated. Three stages of machine learning can be utilized to stratify fault identification in LPBF, with an emphasis on melt pool, powder bed, and part-level sensing. To collect melt pool images and spectrum emissions in the melt pool plume region, for instance, optical and thermal cameras, spectrometers, and laser setups have been instrumented in both off-axis and coaxial ways in prior works.
With the aid of machine learning techniques, the form and splatter signs that these sensors subsequently produced are evaluated to find melt pool-level flaws such as a lack of fusion porosity. The scientific machine learning concept, which makes use of physical process insights, outperforms purely data-driven models in terms of prediction fidelity and computational efficiency, as shown in the following evaluation of several data-driven models for single-track quality prediction.
Additionally, given the physically motivated model development process, this strategy can be applied to various additive manufacturing processes, such as directed energy deposition and electron beam powder bed fusion, in addition to our unique LPBF embodiment. Figure 2 shows the process of gathering data for the machine learning component of this framework.

Figure 3: Representative height maps of single tracks deposited at different printing conditions. Image courtesy of Elsevier

Figure 4: Co-axial high-speed video camera frames. Image courtesy of Elsevier
Methodology
The details of the methodology for data collecting, single-track quality labeling, feature extraction from sensor data, and the creation of machine learning models are addressed in this reference.
Despite the fact that the researchers carry out these stages on their LPBF hardware, their approach is not constrained to the sensing modalities (such as high-speed video and pyrometry data). The methodologies for model creation and validation as well as labeling methodology presented in this article are also transferable. The mean and standard deviation of the width (over its length) and the percent continuity are used to quantify the quality of a single-track.
Results and observations
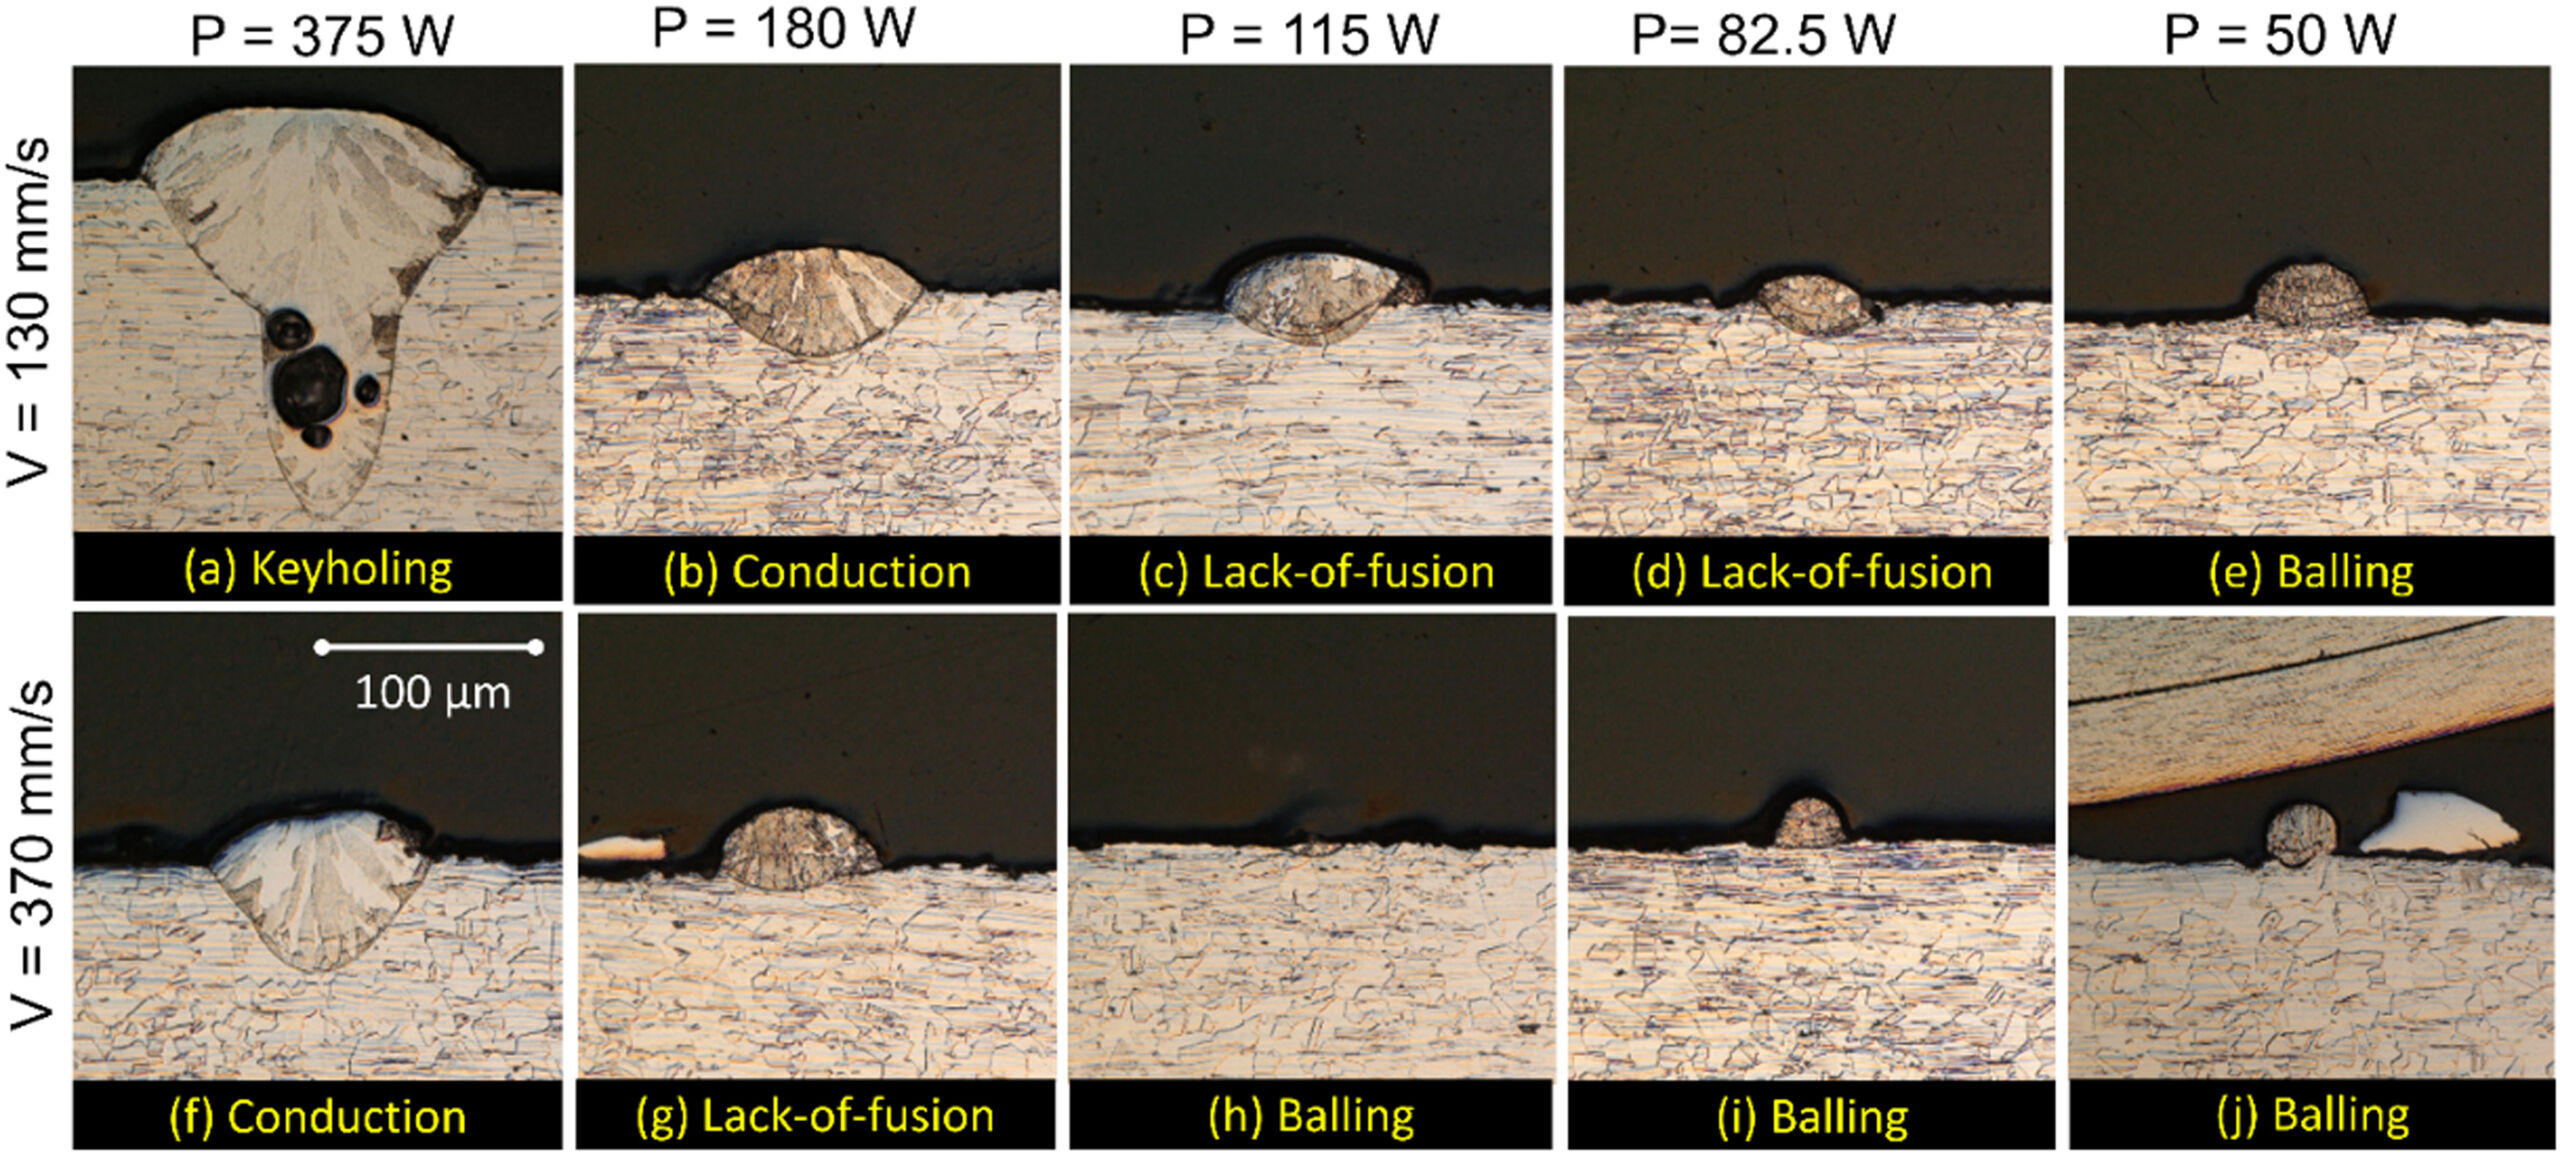
Figure 5 displays the cross-sectioned single tracks, which are produced at a decreased beam width. From these observations, we can learn that three crucial purposes of the cross-sectioning and metallographic examination are as follows:
First, the cross-sectional images give a clearer grasp of the four hypothesized energy density regimes—keyhole, conduction, lack-of-fusion, and balling—as well as the physical justification for their distinction. These process regime demarcations would be illogical physically without the cross-sectional data.
Second, the cross-sectional photos demonstrate the unique weld bead characteristics of single tracks produced in the four energy density regimes, which are suggestive of their morphological quality.
Third, the validity of the energy density regimes produced from optical height maps is supported by cross-sectional images. To put it another way, the cross-sectional pictures offer helpful cross-validation for the optical height map measurements that were employed in this study.

Figure 5: Micrographs of cross-sectioned single tracks. Image courtesy of Elsevier
This article is brought to you by DataRay, world leader in the manufacture of laser beam profiling solutions.
